Finding blocks of text in an image using Python, OpenCV and numpy
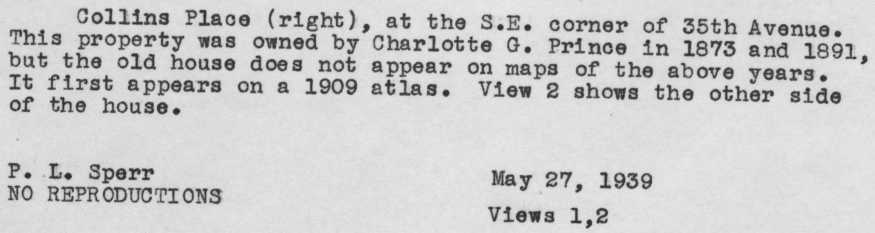
As part of an ongoing project with the New York Public Library, I’ve been attempting to OCR the text on the back of the Milstein Collection images. Here’s what they look like:
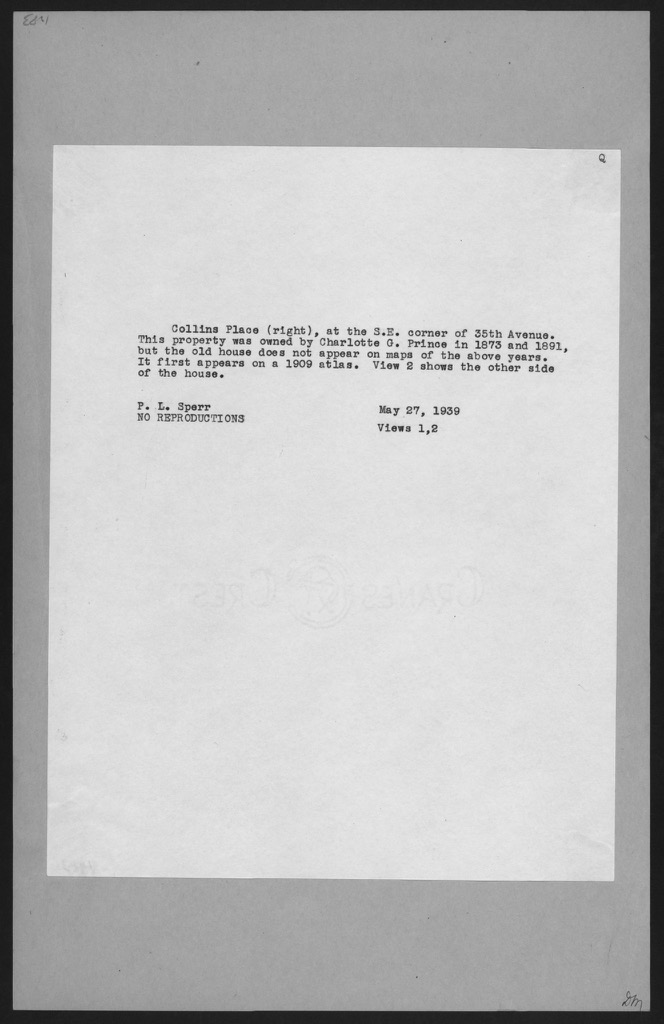
A few things to note:
- There’s a black border around the whole image, gray backing paper and then white paper with text on it.
- Only a small portion of the image contains text.
- The text is written with a tyepwriter, so it’s monospace. But the typewriter font isn’t always consistent across the collection. Sometimes a single image has two fonts!
- The image is slightly rotated from vertical.
- The images are ~4x the resolution shown here (2048px tall)
- There are ~34,000 images: too many to affordably turk.
OCR programs typically have to do some sort of page-layout analysis to find out where the text is and carve it up into individual lines and characters. When you hear “OCR”, you might think about fancy Machine Learning techniques like Neural Nets. But it’s a dirty secret of the trade that page layout analysis, a much less glamorous problem, is at least as important in getting good results.
The most famous OCR program is Tesseract, a remarkably long-lived open source project developed over the past 20+ years at HP and Google. I quickly noticed that it performed much better on the Milstein images when I manually cropped them down to just the text regions first:
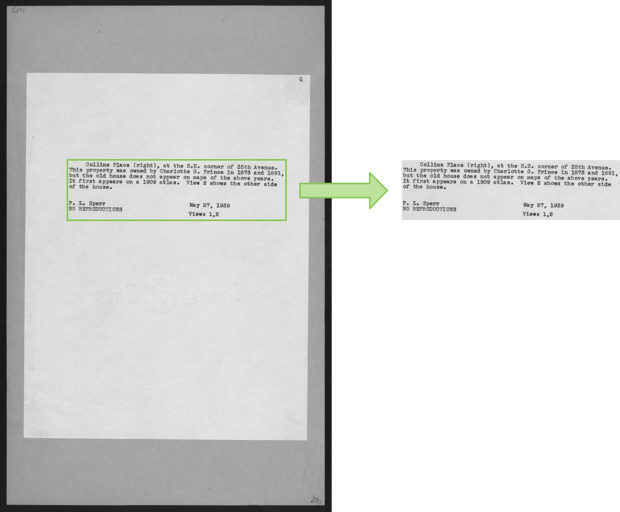
So I set out to write an image cropper: a program that could automatically find the green rectangle in the image above. This turned out to be surprisingly hard!
Computer Vision problems like this one are difficult because they’re so incredibly easy for humans. When you looked at the image above, you could immediately isolate the text region. This happened instantaneously, and you’ll never be able to break down exactly how you did it.
The best we can do is come up with ways of breaking down the problem in terms of operations that are simple for computers. The rest of this post lays out a way I found to do this.
First off, I applied the canny edge detector to the image. This produces white pixels wherever there’s an edge in the original image. It yields something like this:
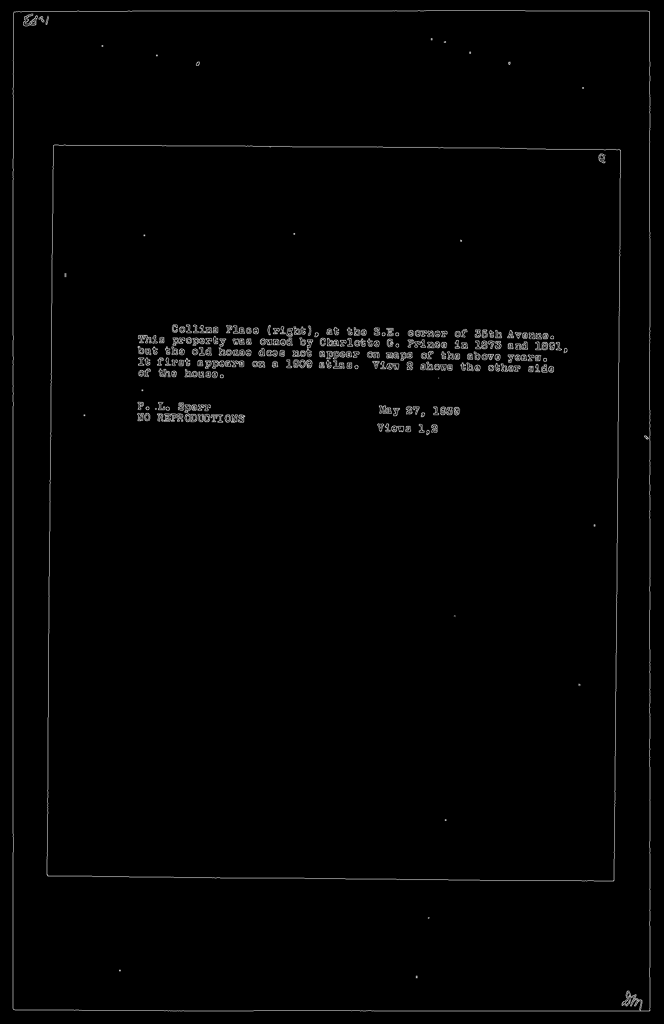
This removes most of the background noise from the image and turns the text regions into bright clumps of edges. It turns the borders into long, crisp lines.
The sources of edges in the image are the borders and the text. To zero in on the text, it’s going to be necessary to eliminate the borders.
One really effective way to do this is with a rank filter. This essentially replaces a pixel with something like the median of the pixels to its left and right. The text areas have lots of white pixels, but the borders consist of just a thin, 1 pixel line. The areas around the borders will be mostly black, so the rank filter will eliminate them. Here’s what the image looks like after applying a vertical and horizontal rank filter:
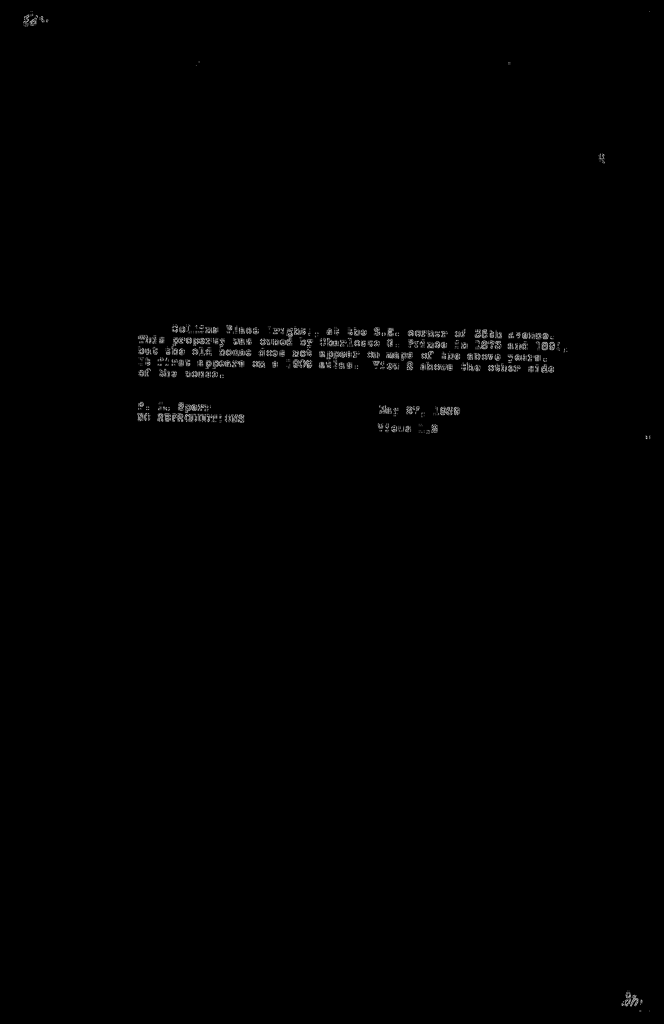
The borders are gone but the text is still there! Success!
While this is effective, it still leaves bits of text outside the borders (look at the top left and bottom right). That may be fine for some applications, but I wanted to eliminate these because they’re typically uninteresting and can confuse later operations. So instead of applying the rank filter, I found the contours in the edge image. These are sets of white pixels which are connected to one another. The border contours are easy to pick out: they’re the ones whose bounding box covers a large fraction of the image:
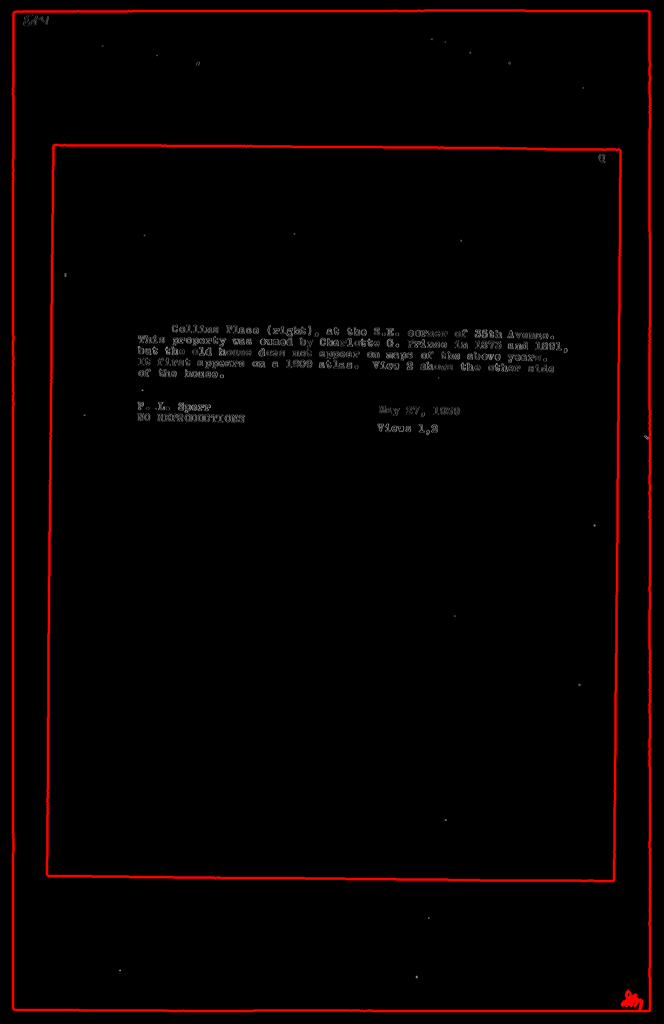
With polygons for the borders, it’s easy to black out everything outside them.
What we’re left with is an image with the text and possibly some other bits due to smudges or marks on the original page.
At this point, we’re looking for a crop (x1, y1, x2, y2) which:
- maximizes the number of white pixels inside it and
- is as small as possible.
These two goals are in opposition to one another. If we took the entire image, we’d cover all the white pixels. But we’d completely fail on goal #2: the crop would be unnecessarily large. This should sound familiar: it’s a classic precision/recall tradeoff:
- The recall is the fraction of white pixels inside the cropping rectangle.
- The precision is the fraction of the image outside the cropping rectangle.
A fairly standard way to solve precision/recall problems is to optimize the F1 score, the harmonic mean of precision and recall. This is what we’ll try to do.
The set of all possible crops is quite large: W2H2, where W and H are the width and height of the image. For a 1300x2000 image, that’s about 7 trillion possibilities!
The saving grace is that most crops don’t make much sense. We can simplify the problem by finding individual chunks of text. To do this, we apply binary dilation to the de-bordered edge image. This “bleeds” the white pixels into one another. We do this repeatedly until there are only a few connected components. Here’s what it looks like:

As we hoped, the text areas have all bled into just a few components. There are five connected components in this image. The white blip in the top right corresponds to the “Q” in the original image.
By including some of these components and rejecting others, we can form good candidate crops. Now we’ve got a subset sum problem: which subset of components produces a crop which maximizes the F1 score?
There are 2N possible combinations of subsets to examine. In practice, though, I found that a greedy approach worked well: order the components by the number of white pixels they contain (in the original image). Keep adding components while it increases the F1 score. When nothing improves the score, you’re done!
Here’s what that procedure produces for this image:
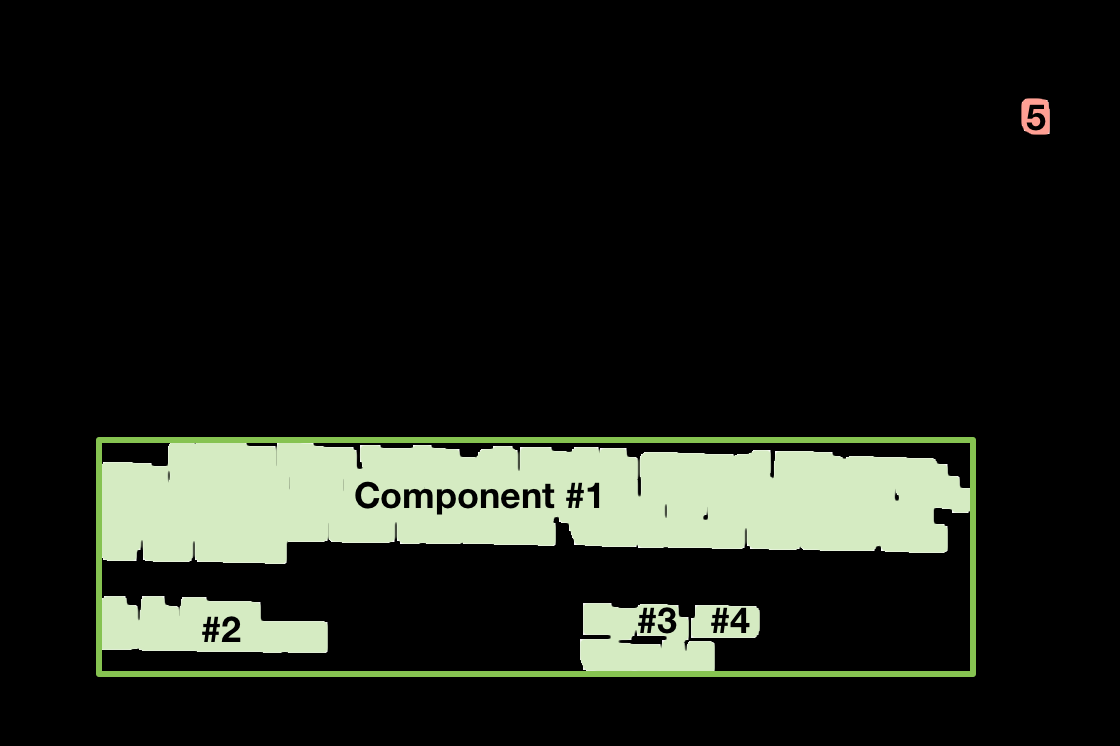
The components are ordered as described above. Component #1 contains the most white pixels in the original image. The first four components are accepted and the fifth is rejected because it hurts the F1 score:
- Accept #1, F1 Score → 0.886
- Accept #2, F1 Score → 0.931
- Accept #3, F1 Score → 0.949
- Accept #4, F1 Score → 0.959
- Reject #5 (F1 Score → 0.888)
Applying this crop to the original image, you get this:
That’s 875x233, whereas the original was 1328x2048. That’s a 92.5% decrease in the number of pixels, with no loss of text! This will help any OCR tool focus on what’s important, rather than the noise. It will also make OCR run faster, since it can work with smaller images.
This procedure worked well for my particular application. Depending on how you count, I’d estimate that it gets a perfect crop on about 98% of the images, and its errors are all relatively minor.
If you want to try using this procedure to crop your own images, you can find
the source code here. You’ll need to install OpenCV, numpy and PIL
to make it work.
I tried several other approaches which didn’t work as well. Here are some highlights:
-
I ran the image through Tesseract to find areas which contained letters. These should be the areas that we crop to! But this is a bit of a chicken and the egg problem. For some images, Tesseract misses the text completely. Cropping fixes the problem. But we were trying to find a crop in the first place!
-
I tried running the images through unpaper first, to remove noise and borders. But this only worked some of the time and I found unpaper’s interface to be quite opaque and hard to tweak.
-
I ran canny, then calculated row and column sums to optimize the x- & y-coordinates of the crop independently. The text regions did show up clearly in charts of the row sums:
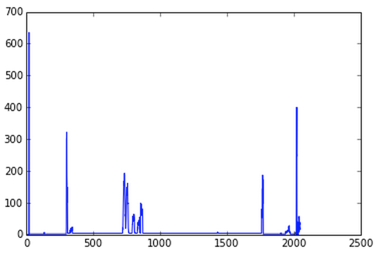
The four spikes are the tops and bottoms of the two borders. The broad elevated region in the middle is the text. Making this more precise turned out to be hard. You lose a lot of structure when you collapse a dimension—this problem turned out to be easier to solve as a single 2D problem than as two 1D problems.
In conclusion, I found this to be a surprisingly tricky problem, but I’m happy with the solution I worked out.
In the next post, I’ll talk about my experience running OCR tools over these cropped images.
Please leave comments! It's what makes writing worthwhile.
comments powered by Disqus