Extracting text from an image using Ocropus
In the last post, I described a way to crop an image down to just the part containing text. The end product was something like this:
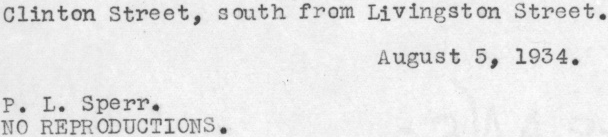
In this post, I’ll explain how to extract text from images like these using the Ocropus OCR library. Plain text has a number of advantages over images of text: you can search it, it can be stored more compactly and it can be reformatted to fit seamlessly into web UIs.
I don’t want to get too bogged down in the details of why I went with Ocropus over its more famous cousin, Tesseract, at least not in this post. The gist is that I found it to be:
- more transparent about what it was doing.
- more hackable
- more robust to character segmentation issues
This post is a bit long, but there are lots of pictures to help you get through it. Be strong!
Ocropus
Ocropus (or Ocropy) is a collection of tools for extracting text from scanned images. The basic pipeline looks like this:
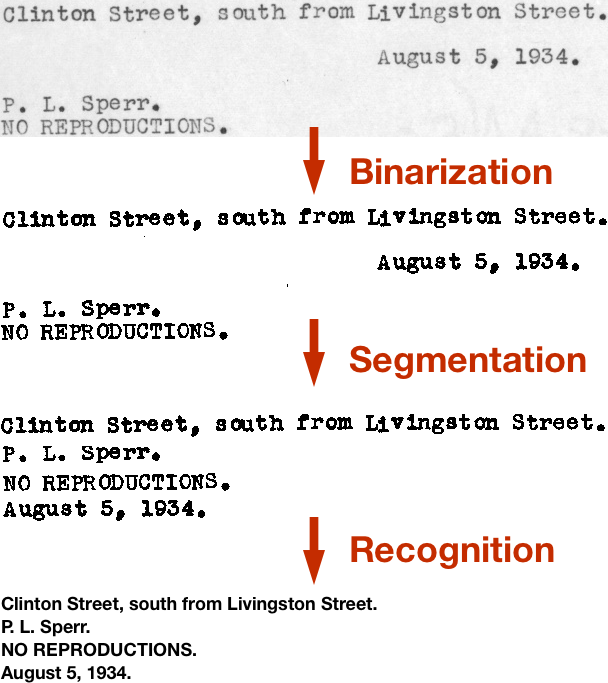
I’ll talk about each of these steps in this post. But first, we need to install Ocropus!
Installation
Ocropus uses the Scientific Python stack. To run it, you’ll need
scipy, PIL, numpy, OpenCV and matplotlib. Setting this up is a bit of a pain, but you’ll only ever have to do it once (at least until you get a new computer).
On my Mac running Yosemite, I set up brew, then ran:
brew install python
brew install opencv
brew install homebrew/python/scipy
To make this last step work, I had to follow the workaround described in this comment:
cd /usr/local/Cellar/python/2.7.6_1/Frameworks/Python.framework/Versions/2.7/lib/python2.7/site-packages
rm cv.py cv2.so
ln -s /usr/local/Cellar/opencv/2.4.9/lib/python2.7/site-packages/cv.py cv.py
ln -s /usr/local/Cellar/opencv/2.4.9/lib/python2.7/site-packages/cv2.so cv2.so
Then you can follow the instructions on the ocropy site. You’ll know
you have things working when you can run ocropus-nlbin --help.
Binarization
The first step in the Ocropus pipeline is binarization: the conversion of the source image from grayscale to black and white.
There are many ways to do this, some of which you can read about in this presentation. Ocropus uses a form of adaptive thresholding, where the cutoff between light and dark can vary throughout the image. This is important when working with scans from books, where there can be variation in light level over the page.
Also lumped into this step is skew estimation, which tries to rotate the image by small amounts so that the text is truly horizontal. This is done more or less through brute force: Ocropy tries 32 different angles between +/-2° and picks the one which maximizes the variance of the row sums. This works because, when the image is perfectly aligned, there will be huge variance between the rows with text and the blanks in between them. When the image is rotated, these gaps are blended.
ocropus-nlbin -n 703662b.crop.png -o book
The -n tells Ocropus to suppress page size checks. We’re giving it a small,
cropped image, rather than an image of a full page, so this is necessary.
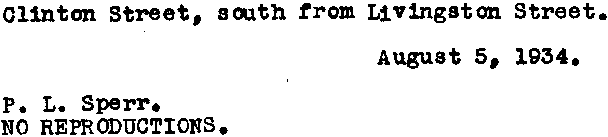
This command produces two outputs:
book/0001.bin.png: binarized version of the first page (above)book/0001.nrm.png: a “flattened” version of the image, before binarization. This isn’t very useful.
(The Ocropus convention is to put all intermediate files in a book working directory.)
Segmentation
The next step is to extract the individual lines of text from the image. Again, there are many ways to do this, some of which you can read about in this presentation on segmentation.
Ocropus first estimates the “scale” of your text. It does this by finding connected components in the binarized image (these should mostly be individual letters) and calculating the median of their dimensions. This corresponds to something like the x-height of your font.
Next it tries to find the individual lines of text. The sequence goes something like this:
- It removes components which are too big or too small (according to scale). These are unlikely to be letters.
- It applies the y-derivative of a Gaussian kernel (p. 42) to detect top and bottom edges of the remaining features. It then blurs this horizontally to blend the tops of letters on the same line together.
- The bits between top and bottom edges are the lines.
A picture helps explain this better. Here’s the result of step 2 (the edge detector + horizontal blur):

The white areas are the tops and the black areas are the bottoms.
Here’s the another view of the same thing:
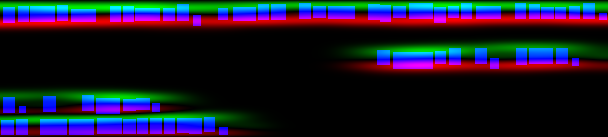
Here the blue boxes are components in the binarized image (i.e. letters). The wispy green areas are tops and the red areas are bottoms. I’d never seen a Gaussian kernel used this way before: its derivative is an edge detector.
Here are the detected lines, formed by expanding the areas between tops and bottoms:

It’s interesting that the lines needn’t be simple rectangular regions. In fact, the bottom two components have overlapping y-coordinates. Ocropus applies these regions as masks before extracting rectangular lines:
![]()
![]()
![]()
![]()
Here’s the command I used (the g in ocropus-gpageseg stands for “gradient”):
ocropus-gpageseg -n --maxcolseps 0 book/0001.bin.png
The --maxcolseps 0 tells Ocropus that there’s only one column in this image.
The -n suppresses size checks, as before.
This has five outputs:
book/0001.pseg.pngencodes the segmentation. The color at each pixel indicates which column and line that pixel in the original image belongs to.book/0001/01000{1,2,3,4}.bin.pngare the extracted line images (above).
Character Recognition
After all that prep work, we can finally get to the fun part: character recognition using a Neural Net.
The problem is to perform this mapping:
August 5, 1934.
This is challenging because each line will have its own quirks. Maybe binarization produced a darker or lighter image for this line. Maybe skew estimation didn’t work perfectly. Maybe the typewriter had a fresh ribbon and produced thicker letters. Maybe the paper got water on it in storage.
Ocropus uses an LSTM Recurrent Neural Net to learn this mapping. The default model has 48 inputs, 200 nodes in a hidden layer and 249 outputs.
The inputs to the network are columns of pixels. The columns in the image are
fed into the network, one at a time, from left to right. The outputs are scores
for each possible letter. As the columns for the A in the image above are fed
into the net, we’d hope to see a spike from the A output.
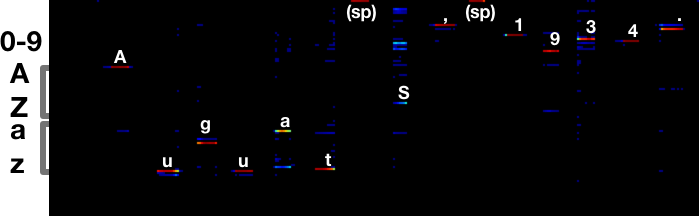
Here’s what the output looks like:

The image on the bottom is the output of the network. Columns in the text and
the output matrix correspond to one another. Each row in the output corresponds
to a different letter, reading alphabetically from top to bottom. Red means a
strong response, blue a weaker response. The red streak under the A is a
strong response in the A row.
The responses start somewhere around the middle to right half of each letter, once the net has seen enough of it to be confident it’s a match. To extract a transcription, you look for maxima going across the image.
In this case, the transcription is Auguat S, 1934.:
It’s interesting to look at the letters that this model gets wrong. For
example, the s in August produces the strongest response on the a row.
But there’s also a (smaller) response on the correct s row. There’s also
considerable ambiguity around the 5, which is transcribed as an S.
My #1 feature request for Ocropus is for it to output more metadata
about the character calls. While there might not be enough information in the
image to make a clear call between Auguat and August, a post-processing
step with a dictionary would clearly prefer the latter.
The transcriptions with the default model are:
![]()
→ O1inton Street, aouth from LIYingston Street.
![]() →
→ P. L. Sperr.
![]() →
→ NO REPODUCTIONS.
![]() →
→ Auguat S, 1934.
This is passable, but not great. The Ocropus site explains why:
There are some things the currently trained models for ocropus-rpred will not handle well, largely because they are nearly absent in the current training data. That includes all-caps text, some special symbols (including “?”), typewriter fonts, and subscripts/superscripts. This will be addressed in a future release, and, of course, you are welcome to contribute new, trained models.
We’ll fix this in the next post by training our own model.
The command to make predictions is:
ocropus-rpred -m en-default.pyrnn.gz book/0001/*.png
I believe the r stands for “RNN” as in “Recurrent Neural Net”.
The outputs are book/0001/01000{1,2,3,4}.txt.
If you want to see charts like the one above, pass --show or --save.
Extracting the text
We’re on the home stretch!
One way to get a text file out of Ocropus is to concatenate all the transcribed text files:
cat book/????/??????.txt > ocr.txt
The files are all in alphabetical order, so this should do the right thing.
In practice, I found that I often disagreed with the line order that Ocropus
chose. For example, I’d say that August 5, 1934. is the second line of the
image we’ve been working with, not the fourth.
Ocropus comes with an ocropus-hocr tool which converts its output to hOCR
format, an HTML-based format designed by Thomas Breuel, who also developed
Ocropus.
We can use it to get bounding boxes for each text box:
$ ocropus-hocr -o book/book.html book/0001.bin.png
$ cat book/book.html
...
<div class='ocr_page' title='file book/0001.bin.png'>
<span class='ocr_line' title='bbox 3 104 607 133'>O1inton Street, aouth from LIYingston Street.</span><br />
<span class='ocr_line' title='bbox 3 22 160 41'>P. L. Sperr.</span><br />
<span class='ocr_line' title='bbox 1 1 228 19'>NO REPODUCTIONS.</span><br />
<span class='ocr_line' title='bbox 377 67 579 88'>Auguat S, 1934.</span><br />
</div>
...
Ocropus tends to read text more left to right than top to bottom. Since I know my images only have one column of text, I’d prefer to emphasize the top-down order. I wrote a small tool to reorder the text in the way I wanted.
Conclusions
Congrats on making it this far! We’ve walked through the steps of running the Ocropus pipeline.
The overall results aren’t good (~10% of characters are incorrect), at least not yet. In the next post, I’ll show how to train a new LSTM model that completely destroys this problem.
Please leave comments! It's what makes writing worthwhile.
comments powered by Disqus